A fresh coat of paint on the ceiling can make a room look new and bright. Stains on the ceiling caused by roof leaks or tobacco smoke can be difficult to hide with regular paint.
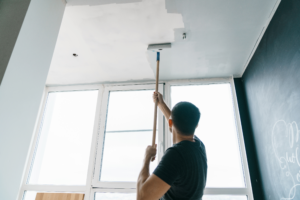
Mix the paint thoroughly before pouring it into a paint tray. This will ensure that the color is consistent and that any settled particles are evenly distributed. Contact Ceiling Painter Wilmington now!
A fresh coat of paint is one of the easiest ways to revitalize a space. It can change the mood of a room and make it more appealing to visitors. However, there are several things to keep in mind when choosing a color for the ceiling. You should consider the function of the room, as this will influence your painting decisions. For example, if you want to lower the height of a small room, you should paint the ceiling darker than the walls. Conversely, if you want to open up a room, you should choose lighter colors for the ceiling and walls.
The type of paint used for the ceiling is also important. Flat or matte white paint is often chosen for ceilings, as it hides imperfections and brightens the room. It is also durable and easy to clean, as dirt and grease will not show up as easily as it would on semi-gloss or high-gloss paint.
Using the right paint for the ceiling can also help to prevent leaks and other problems. It is important to choose a primer designed for ceilings, as this will help the paint adhere and resist moisture. Choosing a ceiling paint with added texture can also help to prevent drips and offer a more even appearance.
Many people struggle with deciding what color to use for the walls and ceilings. It is easy to make a mistake and choose a color that clashes with the walls. This can be difficult to fix once the paint has dried, so it is a good idea to match the color of the walls and ceilings when choosing a shade.
It is very important to hire a professional when it comes to ceiling painting. Working at such a high level is much more dangerous than working on a wall and requires specialized equipment. A commercial / industrial painting contractor will have the experience, training and equipment to safely work on a high-rise facility.
Hiring a professional will also save time and money. A professional can usually complete the job in less time than an amateur and will provide a better result. In addition, most professional painters are insured and can offer peace of mind in the event that any damage or accidents occur during the project.
Primer
When painting a ceiling, it’s best to use a primer specifically formulated for the surface you’re working on. The different kinds of paint and primer available are formulated to handle specific surface conditions such as bare or new drywall, plaster or wood, stains, mildew, oily surfaces, and other issues. A good primer will seal the surface, minimizing drips and allowing you to apply a smooth coat of paint. It will also help conceal any flaws, blemishes or discolorations that are already on the ceiling.
A primer can also be helpful when changing the color of a room dramatically. If you’re going from a dark to light shade, the darker color will show right through a coat of lighter paint unless it is sealed with a primer first.
Using a primer that is tinted to match your existing ceiling paint will save time and money as you’ll need fewer coats of paint to cover the original color. Depending on the age of your house, you may need to test for lead paint content in order to avoid sanding and priming over hazardous materials.
To prepare a surface for painting, a primer must be applied and allowed to dry completely. Then the surface can be sanded to smooth out rough spots or imperfections. There are several types of primers to choose from, including latex-based, water based and oil-based. Latex-based primers are typically low or no-VOC, and they’re easy to clean from your tools and brushes. Water based primers are ideal for bare or new drywall, but they can also be used on wood surfaces, depending on the brand. Oil based primers are great for old or damaged surfaces, but they require more time to dry than a water based or latex-based primer.
It’s also a good idea to purchase a separate primer for transitional situations such as converting from an oil-based paint to a water-based paint. All-in-one products may seem appealing, but it’s best to take the time and money to invest in high quality primer and paint for the most successful project possible.
Cutting in
Nothing transforms a room like a fresh coat of paint. But it’s important to know how to properly apply paint in order to get a clean, professional-looking finish. One essential technique is called cutting in, which involves applying a neat line where the ceiling meets the wall. Whether you’re doing a DIY project or hiring professionals, this tip will help you get smooth and even lines throughout the room.
For best results, use a high-quality, angled brush to cut in along the edge of your walls and ceiling. The stiff bristles will give you precision control and allow you to create a straight line. Make sure to mix your paint thoroughly before applying it, and use a strainer to catch any settled particles. This will ensure that your paint has the right consistency and prevents streaking.
It’s also a good idea to work on a small section at a time. This will make it easier to achieve a consistent line without having to go back and forth from the can of paint.
A good lighting source will also make it easier to see your work and identify any areas that may need additional attention. Natural light is ideal, but if that’s not possible, a directional work lamp can be a great alternative.
Once you’ve finished your first cut-in section, it’s time to roll the main part of the ceiling. Be sure to use the same technique you used for the edges, and try to avoid overlapping your paint lines too much.
Then, once your roller has filled in the main part of the ceiling, it’s a good idea to come back and touch up any areas that you missed with your angled brush. This will help your newly rolled paint blend in seamlessly with the existing ceiling.
Finally, it’s important to remember to clean your brushes and equipment after each use. Be sure to wash your brushes in warm, soapy water or a solvent for oil-based paints. This will keep your tools in good condition for future projects and help you maintain a smooth, even finish.
Rolling
When painting a ceiling, if you use too much pressure, the paint can run or drip. This is known as “foaming.” To avoid this, roll the paint on lightly and try to keep the roller moving in a straight line. It’s also a good idea to use a textured or high-build primer when prepping the ceiling. This will help the paint stick to the ceiling and prevent flaking or peeling later on.
The next step is to sand the ceiling with medium and fine-grit sandpaper. Vacuum the area afterwards to remove any sawdust from the sanding process. Once the ceiling is smooth, it’s ready for a fresh coat of paint. If you’re using a flat paint, a low-nap roller will work best, and if you’re working on a textured ceiling, you’ll need to choose a special texture roller.
Some decorators prefer to spray their ceilings rather than roll them, but this technique can be messy and requires specialized equipment. Spraying also requires extra preparation, such as covering floors and furniture to avoid overspray. This method is ideal for high or textured ceilings that are difficult to reach.
When using a sprayer, painters should use a lower air pressure to ensure that the paint is atomized, which will help prevent overspray and ensure an even finish. Decorators should wear a mask to protect themselves from the spray. They should also take breaks to reduce fatigue and prevent squinting, which can lead to eye strain and paint freckles.
It’s important to match the color of your walls to the ceiling to achieve a cohesive look. While white is the most popular choice, a darker shade can create a dramatic effect and make a space feel larger.
When applying a coat of paint to the ceiling, it’s a good idea to roll parallel to the light source, as this helps prevent roller lines and keeps the surface looking sharp. It’s also a good idea not to go back and forth when rolling, as this can cause the paint to loosen the texture of the ceiling.